Wednesday, March 30, 2011

Simple Cooking in a Bamboo Steamer

I love cooking in my bamboo steamer.  One of the coolest things about this steamer is that you can use it on almost any type of stove- a portable gas stove, an electric stove, an open pit, etc.  As long as you have a well- fitted pot on which to perch it, you're good to go.


Start by finding a wok or pot in which your steamer  fits well.  It should lay perfectly on top of the rim of the wok.  Fill the wok to appximately 2/3  with water.  Make sure that when the water boils, it doesn't touch your food in the lower steamer.


 Place the first level of the steamer on the wok.

Add a steamer cloth (or  lettuce leaves) to keep the food from sticking to the steamer.


Add your heavier foods (those that take longer to cook).  I put my sweet potatoes in the lowest rack and the broccoli above 


Cover the food and bring the water to a boil.  Reduce the heat for a steady low boil and watch your water to make sure that you don't burn your steamer.  If you hear sizzling, you need to add more water if the food requires additional cook time.


 The broccoli was ready first so, I carefully removed the top rack and replaced the lid over the sweet potatoes.

 
 A nice wooden plate over the broccoli, keeps it warm until the sweet potatoes are ready.
 The aroma from the sweet potatoes reveal that they're almost ready.

Test with a fork.  Yep, they're ready.
 Unfortunately, the brown rice isn't ready- forgot to hit the steamer button.  Oh well, I probably didn't need the extra carbs anyway.  So, we'll have to settle for this simple meal- Broccoli, sweet potato and stewed chicken breast.

Sunday, March 27, 2011

Homemade Body Powder

This is a simple and easy to make body powder that does and excellent job of absorbing excess moisture and neutralizing odors (especially sneaker odor).
 
Supplies & Ingredients:  1/2 cup Corn Starch, 1/2 cup Arrowroot Powder, 1 tsp Baking Soda, 3-4 drops of Essential Oils,  1 Powder container with mesh screen, 1 powder puff, a glass or ceramic container for mixing, spoon and/or wooden stick.
 

 Mix the dry ingredients.  


Add your essential oils and stir.

Spoon the mixture into your container.


Add the screen, puff and lid.


 You can change the quantities of the ingredients based on how much of the product you choose to make.


Friday, March 25, 2011

Homemade Herbal Products and Herbal Smokeless Cigarettes

I made  these quick and easy body oils by combing essential oils, a carrier oil and (in one mixture) hot sesame. 


 Mix the carrier oil ( I used cold-pressed sesame oil) with a few drops of your selected essential oils and pour the mixture into a clean, sterile glass or ceramic container.  These are small quantities so I used clear glass but for larger quantities, I use amber or cobalt blue glass containers because the oils stay fresher in these containers as they block out extra light.
 This oil is for muscle aches.  It's a combination of peppermint and lavender essential oils with a few drops of hot sesame.
 Mix and match to create a favorite fragrance of your own for a simple body or massage oil or concentrate on the healing benefits of specific oils to develop healing oils for whatever ails you.
 I Also found these interesting smokeless herbal cigarettes at the local pharmacy.  I purchased two flavors, peppermint (for colds and flu) and a combination labeled, "relaxation". 

 
I've only tried the peppermint as curious friends, snapped up the others before I had a chance to try them.  They are pretty potent.  The peppermint was actually quite effective in opening my stuffy nose and soothing  my sore throat.  The cigarette lasts a long time if you replace the caps on both ends in between uses. 

 I found that once the  oils are depleted from the cigarettes, they can be refreshed by adding a few drops of essential oil to the filter.

Monday, February 7, 2011

Buggin Out with my recycled BOB

 I decided to put together our bug out/ emergency bags and I'd been gathering up all the supplies.  We had almost everything we needed except bags to put the supplies in.  I went to the local department store but all the bags were 69 bucks and up.  Maybe that's not so bad but I really just wanted some inexpensive little bags as we didn't want to lug around huge sacks.


So, I had this old pair of black Khaki's that I decided to sacrifice.  Now, I'm not much of a seamstress but I think the bags came out ok.  First, I cut the legs off up to thigh level.  Then, I cut some additional material from the remaining pants (or should I say, shorts).  I attached these pieces of material the the widest part of the pants to make a base. Then, I folded over the top of the leg and put in an invisible hem.    Next, I took 6 (approximately an arm's length) pieces of wool twine and braided them.  I then waxed the ends and cut them off so that they were neat.   I cut a few holes in the inside of the top of the piece and pulled the twine through doubling it.  Then I knotted it off.  On the back of the bag, I added two black canvas straps and my bag was done.    We discussed adding some waterproofing material to the inside of the bags and/or waterproofing spray to the outside.   We also talked about adding some reflective material and/or patches.  We'll see.

   In the pic above, I'm using an airline pouch to store a bunch of goodies.  Love these rice bowls! ($1)


To each bag  I added  a first aid kit, an herbal first aid kit, waterproof matches, a lighter and a flint stone, toiletries, a very bright LED flashlight, 2 pairs of wool socks, huge scarf pens, a roll of duct tape (very small one), homemade MRE's (dried oatmeal packs, nuts, fruit, jerky, sprout seeds), a sewing kit, a multi-tool knife (One bag has a Gerber Clutch Navy Multi-tool and the other has a Winchester Winframe), A Gerber mini paraframe, a stainless steel canteen, a stainless steel camping mug with a compass lid, a whistle (includes a compass and thermometer), water purification tablets (one bag has a canteen filter), a stainless steel rice bowl with lid ( you can cook in it, eat out of it and carry all your smaller items in this), a p&p, a pad and a super absorbent towel.


 Directly above is the Winchester. Below, the Gerber mini paraframe.


We found a cool pop-up camouflage tent  (appx. $25) that's light weight and easy to carry (prob won't use this unless we're using the car during an emergency because that's where it lives). We also have these magic-like sleeping bags (Asian made) that fold up into an amazingly tiny ball (they're going into the bags), a small reflective mat and our rain ponchos (not pictured but they all fit easily).  Oh and we also keep a 5 gallon collapsible  water container in the car.  That's about it.


Wednesday, January 26, 2011

Organic & Heirloom Seeds

We finally received the first set of our seed collection.  I ordered from several sites, however, the best service was with Peaceful Valley.  The prices were reasonable and they have a huge selection of organic seeds as well as some nice heirlooms.   Since we can't really plant any of those seeds over here, they've been added to our temp controlled storage back home.

We also purchased some seeds and sprouts to experiment with while over here.  I'm planning some container gardening in the spring.  Here's the link to Peaceful Valley.Peaceful Valley

Outsourcing Babies

Now this has nothing to with living off-grid but boy, is this  interesting.  So, I watched this HBO documentary called, "Google Baby".   It's about couples who want babies, women who donate (sell) their eggs, donated sperm, the women in India who, with the consent of their husbands, carry the babies , the gifts they receive - One family got a house. There's also coverage on the people (donor agencies, doctors, nurses, etc.) who make it all possible.

If you get a chance, check out this video- Google Baby.  You may be able to find a link to it here: http://stagevu.com/video/ikcuwpawsgjx.    I ended up watching it in Spanish because I couldn't find a link where I could watch it overseas in English.  

Sunday, January 23, 2011

Homemade Deodorant

We ran out of deodorant this week and since it's way too difficult to get here, I decided to whip up another batch.  Mine is healthier anyway.  I made two batches- a male and a female batch.  The only difference was the essential oils added.  For the male batch I used bergamot, mint and a drop of lavender; for the female batch, rose, lavendar, peppermint and a drop of honeysuckle.  They were both very nice blends.  Everyone was happy.

 Here are the ingredients:

3/4 cups of baking soda
1.5 oz  sunflower oil (about the size of a shot glass)
1 tsp cornflour
essential oils


Here are the steps:

1.   Mix the baking soda and cornstarch.
 2.  Add 1/2 of the oil.
 3.  Add your essential oils by the drop ( I used approximately 1-3 drops of each).
 3.  Mix with wooden spoon or stick.
 4.  Add the rest of the oil and stir.
 5.  Pour into your container.
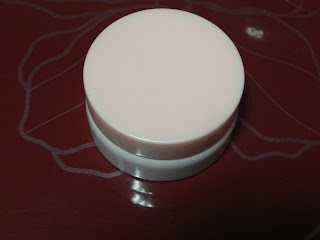
 6.  Add an air-tight lid and label.  I'm using one of my amateur photos for now-pictured above.

This particular mixture feels very light and smooth under your arms.  It works pretty well and even though  it is not an antiperspirant, we've stayed pretty dry.  Everything I needed was in my kitchen so, I didn't have to spend megabucks having deodorant shipped from the states.

Monday, January 17, 2011

Off-grid Shelter

Sweet Off-grid Options!
     Thought I'd share two of my favorite temporary off-grid shelter solutions.  They're tiny homes, much tinier than I'd like for long term but they're sooo nice.  You may want to visit the company websites for a closer look.  I absolutely love these!

Here are the links: http://arvesund.com/en/hermits-cabin/
Shepherd's Rest Huts (The second set of framed pics)
The Yorkshire Hut Company and  Shepherd's Hut as a Guest House- Arigatou Caron!